
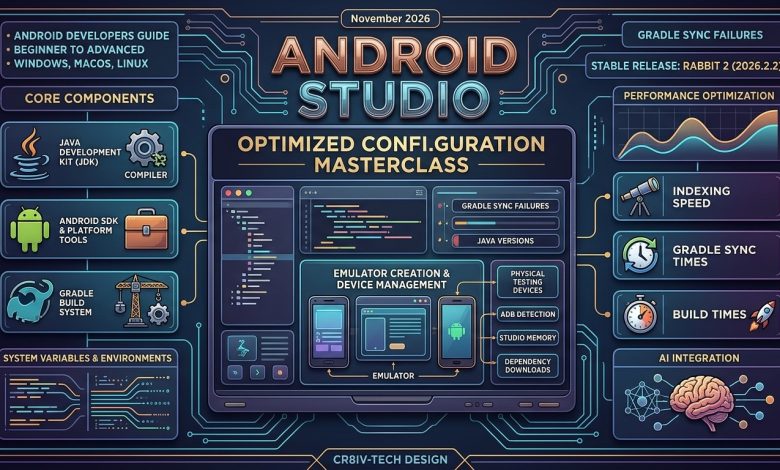
Modern Android Development Environment Setup, JDK, Gradle, SDK, Emulator, ADB, USB Debugging, VM Options, Proxy, Environment Variables & Performance Optimization
AI in Android Studio – Android Developers
Android Studioエミュレータの作成方法|Code for Fun


Instalando Android SDK pelo Android Studio
Tutorial version: November 2026
Latest stable release checked: Android Studio Rabbit 2 (2026.2.2)
Platform: Windows, macOS and Linux
Level: Beginner to Advanced
Official documentation: Android Developers
1. Introduction: Why Android Studio Configuration Matters
Android application development is no longer limited to writing Java or Kotlin code and pressing the Build button. A modern Android development environment consists of several interconnected technologies, including Android Studio, Java Development Kit (JDK), Gradle, Android Gradle Plugin (AGP), Android SDK, SDK Build Tools, Platform Tools, Android Emulator and physical testing devices.
Each component has a different responsibility.
For example, Android Studio provides the development interface, Gradle manages the build process, the JDK provides the Java runtime and compiler environment, and Android SDK supplies the libraries and platform tools required to build Android applications.
If these components are configured incorrectly, developers may experience problems such as:
- Gradle sync failures.
- Unsupported Java or JDK versions.
- Android SDK package errors.
- Emulator startup failures.
- ADB device detection problems.
- Slow project indexing and builds.
- Dependency download failures.
- Android Studio memory issues.
A properly configured development environment reduces these problems and makes application development more predictable.
This tutorial explains how to configure Android Studio using the official Android development documentation and current technologies available in November 2026.
2. Download and Install the Latest Android Studio
Android Studio Build — документация AndroidAPS 3.4
Android Studio is Google’s official Integrated Development Environment (IDE) for Android application development.
An IDE is software that combines a code editor, project management, debugging, building and testing tools into one working environment.
2.1 Latest stable version in November 2026
According to the official Android Developers release information, the latest stable release checked for this tutorial is:
| Information | Version |
|---|---|
| IDE | Android Studio |
| Release name | Rabbit 2 |
| Version | 2026.2.2 |
| Release channel | Stable |
| Android Gradle Plugin compatibility | 7.1–9.5 |
Do not confuse a stable release with a Canary or Preview release. Preview versions provide early access to new features but may contain bugs or incomplete functionality.
Official download:Download Android Studio — Official Website
Release information:Android Studio Rabbit 2 Release Notes
2.2 Windows installation
Follow these steps:
- Open the official Android Studio download page.
- Download the Windows
.exeinstaller. - Run the downloaded installer.
- Follow the installation wizard.
- Keep Android Studio and Android Virtual Device components selected.
- Complete the installation.
- Launch Android Studio.
- Select the Standard installation option if you are a beginner.
- Accept the Android SDK licences.
- Allow the setup wizard to download the required SDK packages.
The first installation may take some time because Android Studio downloads additional development components.
2.3 Standard versus Custom installation
Standard installation is suitable for most beginners. It automatically configures common development components.
Custom installation is useful when you need to control:
- Android SDK installation location.
- User interface theme.
- Emulator configuration.
- SDK packages.
- Download locations.
For a development computer with limited storage, selecting a separate SSD or suitable secondary drive for SDK and project files can help manage disk usage.
3. Understand the Android Studio Development Architecture
Before changing advanced settings, it is important to understand how the different components work together.
Android Gradle plugin, Gradle version, and Android Studio compatibility | by KmDev | Medium
A typical Android application build follows this sequence:
- Developer writes application code in Kotlin or Java.
- Android Studio manages the project and provides development tools.
- Gradle reads the project build configuration.
- Android Gradle Plugin handles Android-specific build operations.
- JDK provides the Java runtime and compiler tools required by the build.
- Android SDK provides Android platform APIs and build resources.
- Build Tools package and prepare application resources.
- Gradle generates the APK or Android App Bundle.
- ADB or Android Studio deploys the application to a device or emulator.
The main components are explained below.
| Component | Primary responsibility |
|---|---|
| Android Studio | Development environment |
| JDK | Java runtime and compiler |
| Gradle | Build automation |
| AGP | Android-specific Gradle integration |
| Android SDK | Android development APIs |
| Build Tools | APK and resource packaging |
| Platform Tools | ADB and device communication |
| Emulator | Virtual Android device |
This separation is important because updating one component does not automatically mean that every other component should also be updated.
4. Configure the Java Development Kit (JDK)
Android Studio [Gradle JDK] – 技术栈
The Java Development Kit is one of the most important components of the Android build environment.
Although Android applications can be written using Kotlin, Java-based development tools remain essential to the Android build ecosystem.
4.1 What is the JDK?
JDK stands for Java Development Kit.
It includes:
- Java runtime components.
- Java compiler.
- Development utilities.
- Supporting libraries and tools.
Gradle runs on a Java Virtual Machine (JVM), so the JDK version must be compatible with the Gradle version and the Android Gradle Plugin used by your project.
4.2 Android Studio’s built-in JDK
Modern Android Studio distributions include JetBrains Runtime (JBR), a customised Java runtime based on OpenJDK.
For most developers, the bundled runtime is the simplest starting point.
You do not need to install a separate Oracle JDK simply because you are developing Android applications.
The important point is to select a compatible JDK for Gradle.
4.3 JDK configuration in Android Studio 2026
Open your Android project.
Navigate to:
File → Settings → Build, Execution, Deployment → Build Tools → Gradle
On macOS, use:
Android Studio → Settings → Build, Execution, Deployment → Build Tools → Gradle
Find the Gradle JDK setting.
Depending on the project and Android Studio version, you may see options such as:
GRADLE_LOCAL_JAVA_HOMEJAVA_HOMEjbr-17- Other detected JDK installations.
- Download JDK.
For newly created projects, the recommended GRADLE_LOCAL_JAVA_HOME option uses the Java home defined in the project’s Gradle configuration properties. Its default points to the bundled JetBrains Runtime.
4.4 Understanding the JDK selection priority
There is an important distinction between the JDK used by Android Studio itself and the JDK used to execute Gradle builds.
The environment variables and runtime selection should not be treated as one universal priority list.
The Android Studio IDE normally uses its bundled JetBrains Runtime unless specifically overridden.
Gradle uses the JDK selected in the Gradle settings or the project’s supported daemon JVM configuration.
The following environment variables can also be relevant:
| Variable | Purpose |
|---|---|
STUDIO_JDK | Overrides the JDK used by Android Studio |
JDK_HOME | Identifies a JDK installation |
JAVA_HOME | Common Java development environment variable |
GRADLE_USER_HOME | Controls Gradle user data and cache location |
For most projects, use the bundled runtime or the recommended project-specific Gradle JDK configuration rather than changing every environment variable manually.
4.5 Verify Java installation
Open Command Prompt or PowerShell:
java -versionCheck the Java compiler:
javac -versionCheck the configured Java home:
echo $env:JAVA_HOMERemember that java -version displays the Java executable found through your current environment. It does not necessarily prove which JDK Android Studio uses for its Gradle build.
Official reference: Java Versions in Android Builds
5. Configure Android Gradle Plugin (AGP) and Gradle
Android Studio – Edit files visible in project view – Stack Overflow
Gradle is the build automation system used by Android Studio. It manages dependencies, compiles source code, processes resources and generates application packages.
The Android Gradle Plugin (AGP) extends Gradle with Android-specific capabilities.
5.1 Understanding the difference
These three technologies have different responsibilities:
- JDK: Runs the Java-based build environment.
- Gradle: Controls the build process.
- AGP: Adds Android application build functionality to Gradle.
All three must be compatible.
5.2 Current compatibility example
For the latest AGP 9.5.0 release checked in October 2026, the official compatibility information specifies:
| Component | Required/default version |
|---|---|
| Android Gradle Plugin | 9.5.0 |
| Gradle | 9.6.0 |
| JDK | 17 |
| SDK Build Tools | 36.0.0 |
| Maximum supported Android API | 37 |
These are the requirements for that particular AGP release, not a recommendation to upgrade every existing project automatically.
Official references:
5.3 Check the Gradle version
Open your Android project and locate:
gradle/wrapper/gradle-wrapper.properties
A typical configuration looks like this:
distributionBase=GRADLE_USER_HOME
distributionPath=wrapper/dists

distributionUrl=https\://services.gradle.org/distributions/gradle-9.6.0-bin.zip

zipStoreBase=GRADLE_USER_HOME
zipStorePath=wrapper/dists
This file controls which Gradle distribution the project uses.
Do not copy this version blindly into an older project. Always check its AGP compatibility first.
5.4 Understand the Android project configuration
Modern Android projects commonly use Kotlin DSL (.gradle.kts) or Groovy DSL (.gradle).
For example:
Kotlin DSL:
plugins {
    id("com.android.application") version "9.5.0" apply false
}
This is an illustrative plugin declaration. Your project should use a compatible Gradle wrapper and the correct plugin configuration.
5.5 Build the project from the command line
Open a terminal in your project root.
On Windows:
.\gradlew.bat --versionBuild the debug APK:
.\gradlew.bat assembleDebugRun a clean build:
.\gradlew.bat clean
.\gradlew.bat assembleDebug
The generated debug APK is normally located at:
app/build/outputs/apk/debug/app-debug.apkThe Gradle Wrapper is preferred because it allows a project to use its defined Gradle version instead of depending on an arbitrary globally installed version.
6. Configure Android SDK
Getting started with Vulkan on Android | Android Developers
Android SDK stands for Android Software Development Kit.
It contains the platform APIs, build resources, command-line utilities and other packages required for Android application development.
Without a properly configured SDK, Android Studio cannot compile and package Android applications.
6.1 Open SDK Manager
Open Android Studio and navigate to:
File → Settings → Languages & Frameworks → Android SDK
The exact navigation may vary between Android Studio versions and project states. You can also open SDK Manager from the toolbar.
The SDK Manager has two important sections:
- SDK Platforms
- SDK Tools
6.2 SDK Platforms
SDK Platforms contains the Android platform versions available for development.
Each Android platform has an API level.
For example:
- API level 34 represents Android 14.
- API level 35 represents Android 15.
- API level 36 represents Android 16.
- API level 37 represents the corresponding newer platform level.
The exact API support available depends on the installed platform and the Android Gradle Plugin version.
You do not need to install every Android platform. Install the platforms required by your applications and testing targets.
6.3 SDK Tools
SDK Tools contains utilities required for application development.
Important packages include:
| Tool | Purpose |
|---|---|
| Android SDK Build Tools | Builds and packages applications |
| Android SDK Platform Tools | Device communication tools |
| Android SDK Command-line Tools | SDK management utilities |
| Android Emulator | Runs virtual Android devices |
| Google USB Driver | Windows USB debugging support for supported Google devices |
| NDK | Native C/C++ development |
| CMake | Native build configuration |
For a normal Kotlin or Java Android application, you generally do not need to install NDK and CMake unless your project requires native code.
6.4 Recommended SDK configuration procedure
- Open SDK Manager.
- Select the Android platform required by your project.
- Open the SDK Tools tab.
- Select Android SDK Build Tools.
- Select Android SDK Platform Tools.
- Select Android SDK Command-line Tools.
- Select Android Emulator if you intend to use virtual devices.
- Click Apply.
- Accept the licences.
- Wait for installation to finish.
Avoid installing unnecessary SDK packages because they consume disk space.
Official reference:Android Studio and SDK Updates
7. Configure Android SDK Environment Variables
Environment variables allow Windows and other operating systems to locate Android development tools without requiring their full directory paths.
For example, instead of typing the complete path to ADB every time, you can execute:
adb devicesThis works when the Platform Tools directory is included in the system PATH.
7.1 Find the Android SDK location
The default Windows SDK location is generally:
C:\Users\YourUserName\AppData\Local\Android\SdkThe actual path can be different if you selected a custom SDK location during installation.
7.2 Create ANDROID_HOME
On Windows:
- Open Start.
- Search for Environment Variables.
- Select Edit the system environment variables.
- Click Environment Variables.
- Under User variables, click New.
- Enter the following:
Variable name:
ANDROID_HOMEVariable value:
C:\Users\YourUserName\AppData\Local\Android\SdkReplace YourUserName with your actual Windows account folder.
7.3 Configure PATH
Under User variables, select Path and click Edit.
Add these entries:
%ANDROID_HOME%\platform-tools
%ANDROID_HOME%\emulator
%ANDROID_HOME%\cmdline-tools\latest\bin
Click OK to save your changes.
Open a new terminal to load the updated environment.
7.4 Verify the configuration
Run:
echo $env:ANDROID_HOMEThen:
adb versionFinally:
sdkmanager --versionIf these commands work, your terminal can locate the corresponding Android development tools.
Important: ANDROID_HOME is the recommended SDK environment variable. ANDROID_SDK_ROOT is a legacy variable and should not be introduced unnecessarily. If both are defined, make sure they point to the same SDK location.
Official reference:Android SDK Command-line Tools
8. Customize Android Studio Using studio.vmoptions
Android Studio is a Java-based development environment. It uses JVM memory to run the IDE, manage project indexing and provide development services.
The studio.vmoptions file allows developers to customize certain JVM startup settings.
8.1 What is studio.vmoptions?
This file can control:
- Initial JVM heap size.
- Maximum JVM heap size.
- Other supported JVM startup options.
- Garbage collection-related settings.
A common reason for modifying this file is to adjust the maximum heap allocation for large projects.
8.2 Open the configuration file
Inside Android Studio:
Help → Edit Custom VM Options
On macOS, use the corresponding Android Studio menu.
If you have never created this file before, Android Studio will ask permission to create it.
Click Create.
8.3 Example memory configuration
For a suitable machine with sufficient available memory, an illustrative configuration is:
-Xms512m
-Xmx2048m
Explanation:
-Xms512m: Sets the initial JVM heap allocation to 512 MB.-Xmx2048m: Sets the maximum JVM heap allocation to 2048 MB.
These values are examples, not universal recommended settings.
A computer with limited RAM should not blindly allocate 2 GB or more to the IDE. Android Studio, Gradle, the operating system and an emulator may all require memory simultaneously.
8.4 Use Android Studio Memory Settings
Modern Android Studio also provides a graphical memory configuration interface.
Navigate to:
File → Settings → Appearance & Behavior → System Settings → Memory Settings
You can adjust supported heap settings through this interface.
The IDE may also notify you when it detects an opportunity to improve memory configuration.
8.5 Important warning
Never directly edit the default studio.vmoptions file inside the Android Studio installation’s bin directory.
Use the custom VM options file instead.
This prevents your custom configuration from unnecessarily modifying the original installation defaults.
Official reference:Customize Android Studio VM Options
9. Customize Android Studio Using idea.properties
The idea.properties file controls specific IDE properties and directory locations.
It is particularly useful when working in enterprise environments, restricted Windows computers or systems where default storage locations are unsuitable.
9.1 What can idea.properties control?
Examples include:
- IDE system directory.
- IDE configuration directory.
- Plugin directory.
- Log directory.
- Other supported IntelliJ Platform properties.
One common use is changing the system directory where Android Studio stores caches and temporary IDE data.
9.2 Open idea.properties
Inside Android Studio, select:
Help → Edit Custom Properties
If the file does not exist, Android Studio can create it.
9.3 Change the IDE system directory
For example:
idea.system.path=C:/WorkFolder/studio/systemThis configuration changes the IDE system directory to the specified location.
Before applying it:
- Create the destination directory.
- Ensure your Windows account has write permission.
- Close Android Studio if required.
- Save the configuration.
- Restart Android Studio.
9.4 Why change the system directory?
Suppose your organisation uses Group Policy to restrict access to certain directories.
The default Android Studio cache directory might be subject to restrictions or antivirus scanning.
Moving the IDE system directory to an approved location may help resolve those environmental problems.
However, do not change the directory simply because a custom path looks more professional.
Official reference:Android Studio Configuration and idea.properties
10. Create and Manage Android Virtual Devices (AVD)
Support 16 KB page sizes | Compatibility | Android Developers
An Android Virtual Device (AVD) is a virtual Android device that runs through the Android Emulator.
It allows developers to test applications without requiring a physical Android phone for every development task.
10.1 What is an Android Emulator?
The Android Emulator simulates an Android device on your computer.
It can reproduce different device configurations, such as:
- Screen dimensions.
- Android versions.
- Memory configurations.
- Device profiles.
- System images.
- Hardware characteristics.
10.2 Open Device Manager
Inside Android Studio:
View → Tool Windows → Device Manager
Depending on the interface version, Device Manager may also be accessible through the toolbar.
10.3 Create a virtual device
Follow these steps:
- Open Device Manager.
- Click Add Device or Create Virtual Device.
- Select a device category.
- Choose a device profile, such as a Pixel device.
- Click Next.
- Select an appropriate Android system image.
- Download the system image if necessary.
- Complete the device configuration.
- Click Finish.
Your virtual device should now appear in Device Manager.
10.4 Select an appropriate system image
When choosing an image, consider:
- Android API level.
- CPU architecture.
- Google APIs availability.
- Google Play support, where needed.
- Available computer hardware.
An x86_64 image is generally appropriate for supported Intel or AMD Windows/Linux development machines, while ARM64 images are relevant for compatible ARM hardware.
10.5 Run your application
Select your virtual device from the Android Studio device selector.
Click the Run button.
Android Studio will build the project, start the emulator and install the application.
10.6 Emulator performance optimization
Emulator performance depends on:
- Processor architecture.
- Available RAM.
- GPU capability.
- Virtualization support.
- System image architecture.
- Storage performance.
Hardware acceleration can significantly improve emulator performance.
For Windows, Microsoft Windows Hypervisor Platform (WHPX) is the recommended virtualization solution in the current documentation.
An important 2026 update: Android Emulator Hypervisor Driver (AEHD) is scheduled to be sunset on December 31, 2026. Windows users should prepare to transition to WHPX.
To check acceleration status, run:
emulator -accel-checkIf the command is not recognized, run it using the full path to the emulator executable.
Official references:
11. Run Android Applications on Physical Devices
How to Enable USB Debugging on Xiaomi Devices – Xiaomiui.Net
Although an emulator is useful, testing on an actual Android device is important before releasing an application.
Physical devices can reveal problems involving:
- Real hardware sensors.
- Camera functionality.
- Device-specific performance.
- Battery usage.
- Bluetooth.
- USB connectivity.
- Real-world screen behaviour.
11.1 Enable Developer Options
On your Android phone:
- Open Settings.
- Find About Phone.
- Locate Build Number.
- Tap Build Number seven times.
- Enter your device PIN if requested.
- Return to Settings.
- Open Developer Options.
The exact location of Build Number depends on the phone manufacturer.
11.2 Enable USB Debugging
Inside Developer Options:
- Find USB Debugging.
- Enable it.
- Connect the phone to your computer using a data-capable USB cable.
- Accept the debugging authorization prompt on your phone.
Do not use a charge-only cable because it may not provide data connectivity.
11.3 Verify device connection
Open PowerShell:
adb devicesA successful connection should show an entry similar to:
List of devices attached
ABC1234567    device
Common statuses:
| Status | Meaning |
|---|---|
device | Device connected and authorized |
unauthorized | Authorization not yet granted |
offline | Device is not communicating correctly |
| No device | ADB cannot detect the phone |
11.4 Install an APK using ADB
Use:
adb install app-debug.apkTo replace an existing application while preserving its data where permitted:
adb install -r app-debug.apk11.5 Wireless debugging
Modern Android development also supports wireless debugging.
Android 11 and higher supports pairing a device and workstation over Wi-Fi using Android Studio and ADB.
General procedure:
- Connect your phone and computer to the same Wi-Fi network.
- Enable Developer Options.
- Enable Wireless Debugging.
- Select Pair Device with Pairing Code.
- Open Android Studio’s Pair Devices Using Wi-Fi interface.
- Enter the pairing code.
- Complete the pairing process.
This removes the need for a permanent USB connection.
The newer ADB Wi-Fi 2.0 functionality introduced alongside Android 17 and ADB 37.0.0 further improves wireless debugging usability.
Official reference:Run Apps on a Hardware Device
12. Install OEM USB Drivers
Windows sometimes needs a manufacturer-specific USB driver to communicate correctly with an Android phone.
An OEM means Original Equipment Manufacturer.
Examples include Google, Samsung and other Android device manufacturers.
12.1 When do you need a USB driver?
A driver may be required when:
- Windows does not recognise the phone correctly.
- ADB cannot detect the device.
- The phone appears as an unknown USB device.
- USB debugging does not establish a connection.
Google USB Driver is intended for supported Google devices. Other manufacturers may provide their own drivers.
12.2 Install the driver
For supported Google devices:
- Open Android Studio.
- Open SDK Manager.
- Select SDK Tools.
- Find Google USB Driver.
- Install the package.
For other brands, download the correct driver from the manufacturer’s official support website.
Do not download random USB drivers from unknown websites.
Official reference:Google USB Driver Installation
13. Configure Android Studio and Gradle Proxy Settings
A proxy server acts as an intermediary between your computer and the internet.
Developers working in corporate networks, restricted environments or certain internet connections may need proxy configuration to download:
- Gradle distributions.
- Android SDK packages.
- Maven dependencies.
- Google development libraries.
- Other build dependencies.
13.1 Configure Android Studio HTTP Proxy
Open:
File → Settings → Appearance & Behavior → System Settings → HTTP Proxy
Available configuration options depend on the installed version.
Common options include:
- No Proxy.
- Auto-detect proxy settings.
- Use system proxy settings.
- Manual proxy configuration.
If your network requires a manual proxy, enter the actual host and port provided by your network administrator.
Use the connection test if available.
13.2 Configure Gradle proxy settings
This is an important correction to the old article.
Gradle proxy properties should not be inserted as arbitrary settings inside the Android module’s build.gradle or build.gradle.kts file.
Instead, use the appropriate gradle.properties file.
For a project-wide configuration, the file is:
YourProject/
    gradle.properties
For a user-level configuration, the usual Windows location is:
C:\Users\YourUserName\.gradle\gradle.propertiesThe user-level configuration is preferable when the same proxy is needed across multiple projects.
13.3 HTTP proxy example
systemProp.http.proxyHost=proxy.example.com
systemProp.http.proxyPort=8080

systemProp.https.proxyHost=proxy.example.com
systemProp.https.proxyPort=8080
Replace the example host and port with your actual proxy information.
13.4 Authenticated proxy example
If your proxy requires authentication:
systemProp.http.proxyHost=proxy.example.com
systemProp.http.proxyPort=8080
systemProp.http.proxyUser=YOUR_USERNAME
systemProp.http.proxyPassword=YOUR_PASSWORD

systemProp.https.proxyHost=proxy.example.com
systemProp.https.proxyPort=8080
systemProp.https.proxyUser=YOUR_USERNAME
systemProp.https.proxyPassword=YOUR_PASSWORD
Security warning: Never commit a real proxy password to a public GitHub repository. Keep credentials in a private user-level configuration and protect access to that file.
13.5 Configure non-proxy hosts
Some internal services should bypass the proxy.
Example:
systemProp.http.nonProxyHosts=localhost|127.*|*.example.localDo not use a proxy configuration unless your network actually requires one.
Official reference:Gradle Networking and Proxy Configuration
14. Android Command-line Tools: Advanced Developer Guide
How to Install Android Studio and SDK Tools in Windows – Make Tech Easier
Android Studio provides graphical tools, but professional Android developers also need to understand command-line utilities.
Command-line tools allow developers to perform development tasks without opening the full IDE.
They are particularly useful for:
- Automated application builds.
- Continuous Integration and Continuous Delivery (CI/CD).
- APK inspection.
- Device debugging.
- SDK installation.
- Emulator management.
- Build troubleshooting.
14.1 Android SDK Command-line Tools
The modern directory structure is:
Android/
└── Sdk/
    └── cmdline-tools/
        └── latest/
            └── bin/
                ├── sdkmanager.bat
                ├── avdmanager.bat
                └── ...
The modern cmdline-tools package replaces the old SDK Tools package.
14.2 sdkmanager
The sdkmanager utility manages Android SDK packages.
List installed and available packages:
sdkmanager --listInstall an Android platform:
sdkmanager "platforms;android-37"Install Build Tools:
sdkmanager "build-tools;36.0.0"Install Platform Tools:
sdkmanager "platform-tools"Accept Android SDK licences:
sdkmanager --licensesUpdate installed SDK packages:
sdkmanager --updateThe actual package versions should be selected according to your project’s requirements.
14.3 avdmanager
The avdmanager utility creates and manages Android Virtual Devices.
List available device definitions:
avdmanager list deviceList available system images:
sdkmanager --listCreate a virtual device:
avdmanager create avd -n Test_Device -k "system-images;android-37;google_apis;x86_64"The system image must already be installed and compatible with the host computer.
List created AVDs:
avdmanager list avd14.4 apkanalyzer
apkanalyzer provides information about an APK after the build process.
It can help inspect:
- APK file size.
- Application manifest.
- Package information.
- DEX information.
- Resources.
For example:
apkanalyzer apk summary app-debug.apkThis can help developers investigate application packaging and size-related problems.
14.5 lint
Android Lint checks source code and project configuration for potential problems.
Run lint through the Gradle Wrapper:
.\gradlew.bat lintLint can identify issues involving:
- Incorrect API usage.
- Potential bugs.
- Resource problems.
- Accessibility.
- Performance.
- Compatibility.
It is good practice to examine lint reports before releasing an application.
14.6 retrace
R8 can obfuscate application code during release builds.
When an application crashes, the resulting stack trace may contain shortened or obfuscated class and method names.
retrace helps map an obfuscated stack trace back to the original source information using the corresponding mapping file.
This is particularly useful when investigating release-only crashes.
14.7 AAPT2
Android Asset Packaging Tool 2 processes Android resources during application builds.
It handles resource compilation, linking and packaging operations.
AAPT2 is normally invoked by the Android build system, so most application developers do not need to run it manually.
14.8 apksigner
apksigner signs Android APK files and verifies their signatures.
To verify an APK:
apksigner verify --verbose --print-certs app-release.apkThis is useful for checking APK signing information before distribution.
14.9 zipalign
zipalign optimizes APK file alignment.
Example:
zipalign -c -v 4 app-release.apkThis checks alignment rather than modifying the APK.
Modern Android Gradle Plugin release workflows normally handle the required packaging and signing operations automatically.
Official reference: Android Command-line Tools Documentation
15. Android SDK Platform Tools: ADB, Logcat and Fastboot
Platform Tools are essential for communicating with Android devices.
The default Windows installation location is:
%ANDROID_HOME%\platform-tools15.1 ADB — Android Debug Bridge
ADB is a communication utility between a computer and an Android device or emulator.
Important commands:
| Command | Function |
|---|---|
adb devices | Lists connected devices |
adb install app.apk | Installs an APK |
adb uninstall package.name | Uninstalls an application |
adb reboot | Restarts a device |
adb shell | Opens a device shell |
adb logcat | Displays system and application logs |
adb pull | Copies files from a device |
adb push | Copies files to a device |
15.2 Logcat
Logcat is particularly useful when an application crashes.
Run:
adb logcatTo clear the existing log buffer:
adb logcat -cTo filter Android runtime exceptions:
adb logcat -s AndroidRuntimeFor example, if your application closes immediately after launching, Logcat may show a Java or Kotlin exception and the relevant stack trace.
This is often more useful than simply seeing that the application has crashed.
15.3 Fastboot
Fastboot is used for specific bootloader-level operations, such as flashing supported device images.
It is not an ordinary application installation utility.
Incorrect Fastboot commands can damage a device’s software installation or erase user data.
Use manufacturer-specific instructions and official factory images when performing bootloader operations.
15.4 Platform Tools updates
Platform Tools are updated independently of Android Studio.
You can update them through SDK Manager or obtain the official package directly.Download Android SDK Platform Tools
16. Customize Android Studio Directory Locations
Android Studio stores different types of data in different locations.
Understanding these directories is useful when moving projects, managing storage or troubleshooting permission problems.
The following table shows typical Windows locations.
| Directory | Default location |
|---|---|
| Gradle cache | %USERPROFILE%\.gradle |
| Android projects | %USERPROFILE%\AndroidStudioProjects |
| Android SDK | %LOCALAPPDATA%\Android\Sdk |
| Android Studio configuration | %APPDATA%\Google\AndroidStudio... |
| Android Studio system files | %LOCALAPPDATA%\Google\AndroidStudio... |
Actual directory names depend on the installed product version and operating system.
16.1 Change Gradle cache location
Gradle stores downloaded dependencies, distributions and other cached information in its user home directory.
To move it, define:
GRADLE_USER_HOMEFor example:
D:\AndroidDevelopment\.gradleAfter changing the environment variable, open a new terminal and restart the relevant development processes.
Existing cached dependencies will not automatically appear in the new location.
16.2 Change Android project location
You can create a new project directory, such as:
D:\AndroidProjectsUse this location when creating new projects.
Moving existing projects requires care because local paths, SDK configurations and other project-specific settings may need adjustment.
16.3 Change Android SDK location
Inside Android Studio:
File → Settings → Languages & Frameworks → Android SDK
Change the SDK location to your desired directory.
For example:
D:\AndroidSDKIf you already have an SDK installation, you can copy it to the new location before updating the configuration.
Verify that the new SDK contains the expected packages.
16.4 Antivirus and real-time scanning
Android projects generate many small files during indexing and building.
Real-time scanning of large Gradle caches, SDK directories and project build folders can sometimes affect performance.
If your antivirus product supports exclusions, consider using only appropriate trusted development directories.
Do not disable antivirus protection globally.
Official reference:Customize Android Studio Configuration Directories
17. Android Studio Performance Optimization
Android Studio performance depends on several factors.
Simply increasing the JVM heap size will not solve every performance problem.
17.1 Use SSD storage
Android development generates a large number of files.
An SSD can significantly improve:
- Project indexing.
- Dependency extraction.
- Gradle operations.
- Emulator startup.
- File access.
For a large Android project, an HDD can become a noticeable performance limitation.
17.2 Manage RAM usage
Android Studio, Gradle, Kotlin compilation and Android Emulator can all use memory simultaneously.
Avoid allocating excessive memory to one component.
For better performance:
- Close unnecessary applications.
- Avoid running multiple emulators simultaneously.
- Use a suitable emulator configuration.
- Keep enough free memory for Windows.
- Adjust Android Studio memory settings only when needed.
17.3 Enable Gradle build caching
Gradle supports build caching, which can reuse previously generated build outputs when the relevant inputs have not changed.
In a suitable project, the following setting can be added to gradle.properties:
org.gradle.caching=trueThis can improve repeated builds when tasks are cacheable.
17.4 Parallel builds
Gradle also supports parallel project execution:
org.gradle.parallel=trueThis is useful for projects with multiple independent modules.
However, it may increase CPU and memory usage.
17.5 Configure Gradle JVM arguments
An illustrative configuration:
org.gradle.jvmargs=-Xmx2g -Dfile.encoding=UTF-8This controls the Gradle build JVM’s maximum heap allocation.
It is separate from the Android Studio IDE heap configured through studio.vmoptions.
Do not confuse these two memory settings.
17.6 Keep development tools updated
Regularly check for compatible updates to:
- Android Studio.
- Android SDK Platform Tools.
- Android Emulator.
- Android SDK Build Tools.
- Android Gradle Plugin.
- Gradle Wrapper.
For an existing production project, check compatibility before updating.
A working project is more valuable than an unnecessary version upgrade.
18. Troubleshooting Common Android Studio Problems
Even after a correct installation, developers may encounter errors. The following solutions cover common situations.
Problem 1: Gradle requires a different Java version
Possible message:
Android Gradle plugin requires Java 17Cause: Gradle is running with an incompatible JDK.
Solution:
- Open Android Studio settings.
- Navigate to Build Tools → Gradle.
- Check the Gradle JDK selection.
- Select a compatible JDK.
- Sync the project again.
Do not assume that the system-installed Java version and Android Studio’s Gradle JDK are identical.
Problem 2: SDK location not found
Possible message:
SDK location not foundCause: The project cannot locate the Android SDK.
Solution:
Check the SDK location in Android Studio.
Also inspect:
local.propertiesA Windows project may contain:
sdk.dir=C\:\\Users\\YourUserName\\AppData\\Local\\Android\\SdkUse the actual SDK location.
Avoid committing machine-specific local.properties paths to a shared repository.
Problem 3: ADB device not detected
Possible causes:
- USB debugging disabled.
- Incorrect USB cable.
- Missing OEM driver.
- USB authorization not accepted.
- ADB process not responding.
Try:
adb kill-server
adb start-server
adb devices
If necessary, reconnect the phone and accept the authorization prompt.
Problem 4: Android Emulator is extremely slow
Check:
- CPU virtualization support.
- BIOS virtualization settings.
- WHPX availability.
- Emulator system image architecture.
- Available RAM.
- Graphics configuration.
Run:
emulator -accel-checkIf virtualization is unavailable, investigate your computer’s BIOS and Windows hypervisor configuration.
Problem 5: Gradle cannot download dependencies
Possible causes include:
- Proxy misconfiguration.
- Internet connection problems.
- Repository availability.
- TLS or certificate errors.
- Incorrect dependency coordinates.
Check the Gradle proxy configuration and the network connection.
Then try:
.\gradlew.bat --refresh-dependenciesThis refreshes dependency resolution and can help diagnose stale dependency cache problems. It is not a guaranteed solution for network failures.
Problem 6: Android Studio consumes too much RAM
Try:
- Close unused projects.
- Stop unnecessary emulators.
- Review IDE memory settings.
- Reduce unnecessary background applications.
- Check Gradle daemon usage.
- Avoid setting unnecessarily high JVM heap limits.
If the computer has limited physical memory, using a physical Android phone instead of an emulator may be more practical.
Problem 7: APK signing verification fails
Check the APK using:
apksigner verify --verbose app-release.apkMake sure you are using the correct signing configuration and that the APK has not been modified after signing.
19. Android Studio Security and Development Best Practices
A professional Android development environment should not only work correctly; it should also protect source code, credentials and application signing keys.
19.1 Protect signing keys
Android applications distributed to users need appropriate signing.
Never publish your private signing keystore or passwords in a public GitHub repository.
Keep them in a secure location and maintain an encrypted backup.
19.2 Protect API keys
Avoid hardcoding sensitive credentials into publicly accessible source code.
Remember that API keys embedded in an APK can potentially be extracted.
For sensitive operations, use an appropriately secured backend.
19.3 Use Git for version control
Git helps developers track code changes and recover earlier working versions.
Useful commands:
git init
git add .
git commit -m "Initial Android project"
Before making major Gradle or SDK changes, commit your working project.
19.4 Maintain a stable development environment
A professional development workflow should follow these principles:
- Use stable Android Studio releases for production development.
- Keep Gradle and AGP compatible.
- Use project-specific JDK configuration.
- Keep SDK packages relevant to your projects.
- Protect signing credentials.
- Test on physical devices.
- Review Logcat and lint reports.
- Back up important source code.
20. Complete Android Studio Configuration Checklist
Use this checklist after installing Android Studio.
Configuration progress
0/20
Install the latest stable Android StudioComplete the initial setup wizardVerify the bundled JDK / Gradle JDKCheck Android Gradle Plugin compatibilityInstall required Android SDK PlatformsInstall Android SDK Build ToolsInstall Android SDK Platform ToolsInstall Android SDK Command-line ToolsConfigure ANDROID_HOMEAdd Platform Tools to PATHCreate and test an Android Virtual DeviceEnable hardware accelerationConnect a physical Android deviceVerify ADB device detectionConfigure proxy only if requiredReview studio.vmoptions if necessaryConfigure idea.properties only if requiredVerify Gradle build and APK generationTest application using LogcatProtect application signing credentials
Reset checklist
21. Official Android Development Documentation and Reference Links
The following are official Google, Android Developers, JetBrains and Gradle documentation sources. They are provided so readers can verify technical details and follow the latest documentation when technologies change.
| No. | Official reference | Topic |
|---|---|---|
| 1 | Android Studio | Download and installation |
| 2 | Android Studio Release Notes | Latest stable release |
| 3 | Configure Android Studio | VM options and IDE properties |
| 4 | Java Versions in Android Builds | JDK configuration |
| 5 | AGP 9.5.0 Release Notes | Current build compatibility |
| 6 | AGP Compatibility | Gradle compatibility |
| 7 | Android Command-line Tools | SDK management |
| 8 | Platform Tools | ADB and device utilities |
| 9 | Managing AVDs | Virtual devices |
| 10 | Emulator Hardware Acceleration | Virtualization |
| 11 | Run Apps on Hardware Devices | USB and Wi-Fi debugging |
| 12 | Google USB Driver | Windows USB driver |
| 13 | Gradle Networking | HTTP and HTTPS proxy |
| 14 | Gradle Build Environment | Gradle properties |
| 15 | JetBrains IDE Documentation | IDE configuration |
22. Conclusion
Configuring Android Studio correctly is an important part of professional Android application development.
A reliable development environment requires more than installing the IDE. Developers must understand how the JDK, Gradle, Android Gradle Plugin, Android SDK, Build Tools, Platform Tools and Emulator work together.
The most important lesson is to maintain compatibility between these components instead of updating them independently without checking their requirements.
For beginners, the recommended starting point is the stable Android Studio release, its bundled Java runtime, the recommended Gradle JDK configuration, the required Android SDK packages and a working physical device or emulator.
For advanced developers, understanding command-line tools, Gradle caching, proxy configuration, JVM settings, ADB and build troubleshooting provides greater control over the entire Android development process.
Android Studio is the development environment. Your configuration determines how efficiently and reliably you can use it.
Editorial note: This tutorial is based on official documentation checked on November 2, 2026. Android Studio, Gradle, AGP and Android SDK releases may change. Version-specific examples should always be checked against the compatibility documentation before being applied to an existing project.
Suggested WordPress SEO information
- SEO Title: Android Studio Configuration 2026 – Complete Beginner to Advanced Guide
- Slug:
android-studio-configuration-2026 - Meta Description: Learn Android Studio configuration in 2026, including JDK, Gradle, Android SDK, Emulator, ADB, USB debugging, environment variables, proxy settings and performance optimization.
- Focus Keyword: Android Studio Configuration 2026
- Category: Android Development / Programming Tutorials
- Tags: Android Studio, Android SDK, JDK, Gradle, Android Emulator, ADB, Kotlin, Android Development
Recommended featured image concept:
Run apps on a hardware device | Android Studio | Android Developers
Is this conversation helpful so far?