
Introduction
Modern websites are no longer limited to displaying static HTML pages. Almost every interactive website communicates with servers to retrieve information, submit forms, update records, authenticate users, and display dynamic content without reloading the entire page.
For example, when you open a shopping website, the product list may be retrieved from a server. When you submit a login form, your credentials are sent to an authentication endpoint. When you check the weather, the application requests current weather information from an external API.
These operations are commonly performed through API calls.


JavaScript provides several ways to communicate with APIs and web servers. Some are built directly into the browser, while others are third-party libraries that provide additional features and convenient interfaces.
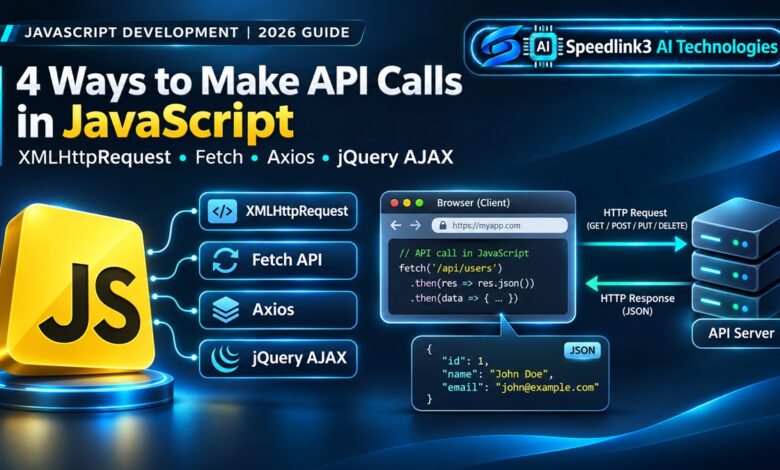
In this updated tutorial, we will explore four important approaches to making API calls in JavaScript:
XMLHttpRequest (XHR)
Fetch API
Axios
jQuery AJAX
We will also cover modern JavaScript techniques such as async/await, AbortController, request timeouts, JSON data handling, HTTP methods, authentication headers, CORS, error handling, and API security.
By the end of this tutorial, you will understand not only how to make an API request but also how to choose the right approach for a real-world web application.
- What Is an API Call in JavaScript?
API stands for Application Programming Interface. It provides a defined way for one software application to communicate with another.
An API call is a request sent by one application to another application or service to retrieve information or perform an operation.
For example, imagine that you are developing a website for an ISP business. You want to display customer information from a database without refreshing the entire page.
The browser can send an HTTP request to your backend API. The backend receives the request, processes it, communicates with the database, and returns a response.
The browser then uses JavaScript to display the returned information.
A simplified API communication process looks like this:
User Action
|
v
JavaScript Application
|
v
HTTP API Request
|
v
Web Server / API
|
v
Application Logic
|
v
Database
|
v
API Response (JSON)
|
v
JavaScript Processes Response
|
v
Update Website Interface
For example, a JavaScript application may request a GitHub user profile:
fetch(“https://api.github.com/users/speedlink3“);
The browser sends an HTTP request to the GitHub API. If the request is permitted and successful, the server returns information about the requested account.
The response can contain data such as:
Username
Name
Public profile URL
Public repository count
Followers
Following
The important point is that JavaScript does not need direct access to the server’s database. It communicates through an API endpoint.
- Understanding HTTP Methods
Before making API calls, you should understand the most common HTTP methods.
An HTTP method describes the intended operation of a request.
HTTP MethodPurposeExampleGETRetrieve informationGet customer detailsPOSTSubmit or create informationCreate a new customerPUTReplace an existing resourceReplace a customer recordPATCHPartially update a resourceUpdate a customer’s emailDELETEDelete a resourceDelete a customer recordHEADRetrieve response headers without the response bodyCheck resource metadataOPTIONSDiscover communication options supported by a resourceCheck permitted methods
For example:
fetch(“/api/customers”, {
method: “GET”
});
This requests customer information.
To create a customer, you might use:
fetch(“/api/customers”, {
method: “POST”
});
However, a real POST request usually needs a request body containing the information to be submitted.
The server must also be designed to support the requested method. Using DELETE on an endpoint does not automatically mean that the server will allow deletion.
- Understanding JSON Data
Most modern web APIs exchange structured information using JSON.
JSON stands for JavaScript Object Notation. It is a lightweight text-based format used to represent data.
Example JSON response:
{
“id”: 101,
“name”: “Shahbaz”,
“username”: “speedlink3”,
“email”: “example@example.com“,
“active”: true
}
JavaScript can convert JSON text into a JavaScript object using JSON.parse().
const jsonText = ‘{“name”:”Shahbaz”,”active”:true}’;
const user = JSON.parse(jsonText);
console.log(user.name);
console.log(user.active);
To convert a JavaScript object into JSON text, use JSON.stringify().
const user = {
name: “Shahbaz”,
active: true
};
const jsonText = JSON.stringify(user);
console.log(jsonText);
These two methods are especially important when sending information to or receiving information from an API.
Remember:
JSON.parse() converts JSON text into a JavaScript value.
JSON.stringify() converts a JavaScript value into JSON text.
- Four Ways to Make API Calls in JavaScript
Let’s explore the four commonly used methods with practical examples.
Method 1: XMLHttpRequest (XHR)
XMLHttpRequest, commonly called XHR, is a built-in browser API that allows JavaScript to send HTTP requests and receive responses.
It was one of the original ways to communicate with web servers asynchronously from browser-based JavaScript applications.
Although the Fetch API provides a more modern interface, XMLHttpRequest is still supported by modern browsers and remains useful in existing applications.
Important correction: XMLHttpRequest was not deprecated by ES6. ES6 introduced major JavaScript language features such as let, const, arrow functions, and Promises. Fetch later became a modern alternative for network requests, but XMLHttpRequest itself remains a supported web API.
4.1 Basic XMLHttpRequest GET Request
const xhr = new XMLHttpRequest();
xhr.open(
“GET”,
“https://api.github.com/users/speedlink3“,
true
);
xhr.onload = function () {
if (xhr.status >= 200 && xhr.status < 300) {
const data = JSON.parse(xhr.responseText);
    console.log(data);
} else {
    console.error("HTTP Error:", xhr.status);
}
};
xhr.onerror = function () {
console.error(“Network error occurred.”);
};
xhr.send();
Explanation
Let’s understand the important parts of this code.
Step 1: Create an XMLHttpRequest object
const xhr = new XMLHttpRequest();
This creates a new XHR object.
The object provides methods and properties for configuring, sending, and monitoring an HTTP request.
Step 2: Configure the request
xhr.open(“GET”, “https://api.github.com/users/speedlink3“, true);
The open() method accepts several arguments.
First argument: HTTP method.
Second argument: API endpoint URL.
Third argument: Whether the request should be asynchronous.
Here, true means the request is asynchronous.
Step 3: Handle the response
xhr.onload = function () {
if (xhr.status >= 200 && xhr.status < 300) {
const data = JSON.parse(xhr.responseText);
console.log(data);
}
};
The onload event runs when the request completes.
We check the HTTP status before processing the response.
The responseText property contains the response as text. Since the API returns JSON, we use JSON.parse() to convert it into a JavaScript object.
Step 4: Send the request
xhr.send();
The send() method starts the request.
4.2 Understanding XMLHttpRequest readyState
One useful feature of XMLHttpRequest is its readyState property.
It represents the current state of the request.
ValueConstantMeaning0UNSENTRequest object created1OPENEDopen() has been called2HEADERS_RECEIVEDResponse headers received3LOADINGResponse data is being received4DONERequest operation completed
You can monitor these states using onreadystatechange.
const xhr = new XMLHttpRequest();
xhr.onreadystatechange = function () {
console.log(“Ready State:”, xhr.readyState);
if (xhr.readyState === 4) {
    console.log("HTTP Status:", xhr.status);
    console.log("Response:", xhr.responseText);
}
};
xhr.open(
“GET”,
“https://api.github.com/users/speedlink3“,
true
);
xhr.send();
Remember that readyState === 4 means the request operation has completed. It does not necessarily mean the HTTP request succeeded. Always inspect the status code as well.
4.3 Setting an XMLHttpRequest Timeout
A request may take longer than expected because of server delays or network problems.
You can set a timeout:
const xhr = new XMLHttpRequest();
xhr.open(“GET”, “https://api.github.com/users/speedlink3“, true);
xhr.timeout = 5000;
xhr.onload = function () {
if (xhr.status >= 200 && xhr.status < 300) {
console.log(JSON.parse(xhr.responseText));
} else {
console.error(“HTTP Error:”, xhr.status);
}
};
xhr.ontimeout = function () {
console.error(“Request timed out.”);
};
xhr.onerror = function () {
console.error(“Network error.”);
};
xhr.send();
Here, 5000 means 5,000 milliseconds, or five seconds.
4.4 Cancelling an XMLHttpRequest
You can cancel an ongoing request using abort().
const xhr = new XMLHttpRequest();
xhr.open(“GET”, “https://api.github.com/users/speedlink3“, true);
xhr.send();
// Cancel the request if required
xhr.abort();
In a real application, you would usually call abort() after a user action or when a component no longer needs the request.
When should you use XMLHttpRequest?
Maintaining older JavaScript applications.
Working with existing XHR-based libraries.
Monitoring upload progress.
Supporting applications that already depend on XHR events.
Implementing legacy integrations.
For most new browser applications, Fetch is generally a more convenient starting point.
Method 2: Fetch API
The Fetch API is a modern browser interface for making HTTP requests.
It provides a Promise-based approach to retrieving resources from a server.
Unlike the traditional XHR callback approach, Fetch works naturally with .then(), .catch(), and modern async/await syntax.
Fetch is built into modern browsers, so you do not need to install an external library to use it.
5.1 Basic Fetch GET Request
fetch(“https://api.github.com/users/speedlink3“)
.then(response => {
return response.json();
})
.then(data => {
console.log(data);
})
.catch(error => {
console.error(“Request failed:”, error);
});
Explanation
Step 1: Call fetch()
fetch(“https://api.github.com/users/speedlink3“);
The fetch() function starts an HTTP request and returns a Promise.
A Promise represents an operation that may complete successfully or fail in the future.
Step 2: Process the Response
.then(response => {
return response.json();
})
The first .then() receives a Response object.
The json() method reads the response body and parses it as JSON.
It also returns a Promise, so we return it to the next .then().
Step 3: Access the data
.then(data => {
console.log(data);
})
Once JSON parsing completes, the next .then() receives the JavaScript data.
Step 4: Handle errors
.catch(error => {
console.error(error);
});
The catch() block handles rejected Promises, such as network failures and JSON parsing errors.
5.2 Using async/await with Fetch
The async/await syntax makes asynchronous JavaScript easier to read.
Instead of chaining multiple .then() calls, you can write the operation in a more sequential style.
async function getUser() {
try {
const response = await fetch(
“https://api.github.com/users/speedlink3“
);
    const data = await response.json();

    console.log(data);

} catch (error) {
    console.error("Error:", error);
}
}
getUser();
Let’s understand the important keywords.
async declares an asynchronous function.
await waits for a Promise to settle inside an async function.
try contains the code that may throw an error.
catch handles the error.
One important detail: await does not block the entire browser. It pauses the execution of the current async function while other JavaScript tasks can continue.
5.3 Handling HTTP Errors Correctly
This is one of the most important concepts when using Fetch.
A common beginner mistake is assuming that Fetch automatically throws an error when the server returns HTTP 404 or 500.
That is not how Fetch works.
For HTTP responses such as 404 Not Found or 500 Internal Server Error, the Fetch Promise normally resolves with a Response object.
Therefore, you must check response.ok or response.status.
async function getUser() {
try {
const response = await fetch(
“https://api.github.com/users/speedlink3“
);
    if (!response.ok) {
        throw new Error(
            `HTTP Error: ${response.status}`
        );
    }

    const data = await response.json();

    console.log(data);

} catch (error) {
    console.error("API Error:", error.message);
}
}
getUser();
The response.ok property is true for HTTP status codes in the 200–299 range.
This small check makes your API handling much more reliable.
5.4 Sending POST Data with Fetch
A GET request retrieves information. A POST request can submit information to a server.
Example:
async function createPost() {
const postData = {
title: “JavaScript API Tutorial”,
body: “Learning modern API calls.”,
userId: 1
};
try {
    const response = await fetch(
        "https://jsonplaceholder.typicode.com/posts",
        {
            method: "POST",

            headers: {
                "Content-Type": "application/json"
            },

            body: JSON.stringify(postData)
        }
    );

    if (!response.ok) {
        throw new Error(`HTTP Error: ${response.status}`);
    }

    const result = await response.json();

    console.log("Created:", result);

} catch (error) {
    console.error(error);
}
}
createPost();
Important details:
method defines the HTTP method.
headers provide metadata about the request.
Content-Type: application/json tells the server that the request body contains JSON.
JSON.stringify() converts the JavaScript object into JSON text.
body contains the information being submitted.
JSONPlaceholder is a testing service. Its POST endpoint is useful for demonstrations; do not treat its simulated result as a permanent database record.
5.5 Adding Query Parameters
Many APIs accept query parameters to filter or search data.
You can use URLSearchParams instead of manually concatenating query strings.
const params = new URLSearchParams({
q: “javascript”,
page: “1”,
limit: “10”
});
const url = https://example.com/api/search?${params};
console.log(url);
This helps correctly encode query parameter values.
For example, spaces and special characters are encoded appropriately.
5.6 Setting Request Headers
Some APIs require an authentication token or additional request headers.
async function getPrivateData() {
const response = await fetch(“/api/profile”, {
method: “GET”,
    headers: {
        "Accept": "application/json",
        "Authorization": "Bearer YOUR_ACCESS_TOKEN"
    }
});

if (!response.ok) {
    throw new Error(`HTTP Error: ${response.status}`);
}

const data = await response.json();

console.log(data);
}
Replace the placeholder with an appropriate token obtained through your application’s authentication flow.
Never place a private server API key or secret credential directly inside publicly accessible frontend JavaScript.
5.7 Cancelling Fetch Requests with AbortController
Modern Fetch supports request cancellation through AbortController.
This is useful when a user changes a search query before the previous request finishes.
const controller = new AbortController();
async function loadData() {
try {
const response = await fetch(
“https://api.github.com/users/speedlink3“,
{
signal: controller.signal
}
);
    if (!response.ok) {
        throw new Error(`HTTP Error: ${response.status}`);
    }

    const data = await response.json();

    console.log(data);

} catch (error) {
    if (error.name === "AbortError") {
        console.log("Request cancelled.");
    } else {
        console.error(error);
    }
}
}
loadData();
// Cancel the request when necessary:
// controller.abort();
The controller provides a signal that is passed to Fetch. Calling abort() cancels the associated operation.
5.8 Modern Fetch Timeout with AbortSignal.timeout()
Modern browsers support AbortSignal.timeout().
It provides a convenient way to stop a request after a specified amount of active time.
async function getData() {
try {
const response = await fetch(
“https://api.github.com/users/speedlink3“,
{
signal: AbortSignal.timeout(5000)
}
);
    if (!response.ok) {
        throw new Error(`HTTP Error: ${response.status}`);
    }

    const data = await response.json();

    console.log(data);

} catch (error) {
    if (error.name === "TimeoutError") {
        console.error("The request timed out.");
    } else {
        console.error("Request failed:", error);
    }
}
}
getData();
Here, the request is automatically aborted after the specified timeout.
This feature is useful for preventing an application from waiting indefinitely for a response.
Method 3: Axios
Axios is a popular Promise-based HTTP client for JavaScript.
It can be used in browser applications and Node.js environments.
While Fetch is built into modern browsers, Axios is an external library that provides additional request configuration, response handling, interceptors, cancellation, and other conveniences.
6.1 Installing Axios
For projects using npm:
npm install axios
For projects using pnpm:
pnpm add axios
For projects using yarn:
yarn add axios
You can also load Axios through a CDN in a simple HTML project.
For production, use a specific tested version instead of automatically loading an unpinned latest version.
Replace 1.x.x with the exact version selected for your project.
6.2 Import Axios into JavaScript
For a modern JavaScript project:
import axios from “axios”;
If your project uses a compatible CommonJS environment:
const axios = require(“axios”);
Use the import style supported by your project and build system.
6.3 Basic Axios GET Request
import axios from “axios”;
async function getUser() {
try {
const response = await axios.get(
“https://api.github.com/users/speedlink3“
);
    console.log(response.data);

} catch (error) {
    console.error("Axios Error:", error.message);
}
}
getUser();
One important difference between Fetch and Axios is how response data is accessed.
With Fetch:
const response = await fetch(url);
const data = await response.json();
With Axios:
const response = await axios.get(url);
const data = response.data;
Axios normally parses JSON responses automatically when the response content type and data allow it.
6.4 Axios POST Request
import axios from “axios”;
async function createPost() {
const postData = {
title: “Learning Axios”,
body: “Making API calls with Axios.”,
userId: 1
};
try {
    const response = await axios.post(
        "https://jsonplaceholder.typicode.com/posts",
        postData
    );

    console.log("Response:", response.data);

} catch (error) {
    console.error("Request failed:", error.message);
}
}
createPost();
Notice that you do not need to manually call JSON.stringify() for an ordinary JavaScript object in this example. Axios handles the request data serialization.
6.5 Setting Axios Headers and Timeout
import axios from “axios”;
async function getProfile() {
try {
const response = await axios.get(“/api/profile”, {
timeout: 5000,
        headers: {
            "Accept": "application/json",
            "Authorization": "Bearer YOUR_ACCESS_TOKEN"
        }
    });

    console.log(response.data);

} catch (error) {
    console.error(error);
}
}
getProfile();
The timeout option specifies the maximum time the request can wait before Axios reports a timeout error.
A production application should configure an appropriate timeout rather than allowing requests to wait indefinitely.
6.6 Creating a Reusable Axios Instance
When an application communicates with the same API repeatedly, creating an Axios instance can make the code easier to maintain.
import axios from “axios”;
const api = axios.create({
baseURL: “https://example.com/api“,
timeout: 10000,
headers: {
    "Accept": "application/json"
}
});
async function getCustomers() {
try {
const response = await api.get(“/customers”);
    console.log(response.data);

} catch (error) {
    console.error(error);
}
}
getCustomers();
Now you can use api.get(), api.post(), and other request methods without repeatedly writing the full base URL.
6.7 Understanding Axios Interceptors
Interceptors allow you to run logic before a request is sent or after a response is received.
They are useful for shared authentication handling, logging, and centralized error processing.
Example:
api.interceptors.request.use(
config => {
console.log(“Sending request:”, config.url);
    return config;
},

error => {
    return Promise.reject(error);
}
);
A response interceptor can process successful responses or handle common errors.
api.interceptors.response.use(
response => {
return response;
},
error => {
    console.error("API Response Error:", error.message);

    return Promise.reject(error);
}
);
Interceptors should be designed carefully. For example, blindly retrying every failed POST request can create duplicate records or payments.
6.8 Cancelling Axios Requests
Modern Axios supports AbortController.
import axios from “axios”;
const controller = new AbortController();
async function getData() {
try {
const response = await axios.get(
“https://api.github.com/users/speedlink3“,
{
signal: controller.signal
}
);
    console.log(response.data);

} catch (error) {
    if (axios.isCancel(error)) {
        console.log("Request cancelled.");
    } else {
        console.error(error);
    }
}
}
getData();
// Cancel when needed:
// controller.abort();
The older Axios CancelToken API is deprecated. For new code, use AbortController instead.
Method 4: jQuery AJAX
jQuery AJAX is another established method for making asynchronous HTTP requests.
It is built around jQuery’s AJAX functionality and uses the $.ajax() method for flexible request configuration.
Although modern applications often prefer Fetch or Axios, jQuery AJAX remains useful in existing jQuery-based websites, older WordPress themes, and legacy projects.
7.1 Including jQuery
You need to load jQuery before using its AJAX methods.
For a simple HTML example:
For a production website, pin the version you have tested.
If you are developing a WordPress theme or plugin, use WordPress’s script enqueue system rather than inserting duplicate jQuery scripts directly into the page.
7.2 Basic jQuery AJAX GET Request
$(document).ready(function () {
$.ajax({
    url: "https://api.github.com/users/speedlink3",

    method: "GET",

    dataType: "json",

    success: function (result) {
        console.log(result);
    },

    error: function (xhr, status, error) {
        console.error("AJAX Error:", status, error);
    }

});
});
Explanation
$(document).ready()
This ensures that the DOM is ready before the enclosed code runs.
url
Specifies the API endpoint.
method
Defines the HTTP method, such as GET or POST.
dataType
Tells jQuery what response data type is expected. Here, we use JSON.
success
Runs when the request succeeds.
error
Runs when the request fails.
7.3 jQuery AJAX POST Request
$.ajax({
url: “/api/customers”,
method: "POST",

contentType: "application/json",

dataType: "json",

data: JSON.stringify({
    name: "Shahbaz",
    email: "example@example.com"
}),

success: function (response) {
    console.log("Customer created:", response);
},

error: function (xhr, status, error) {
    console.error("Request failed:", error);
}
});
Here, contentType describes the format of the request body, while dataType describes the expected response format.
These two settings are not interchangeable.
7.4 Setting a jQuery AJAX Timeout
$.ajax({
url: “/api/customers”,
method: "GET",

dataType: "json",

timeout: 5000,

success: function (data) {
    console.log(data);
},

error: function (xhr, status, error) {
    if (status === "timeout") {
        console.error("Request timed out.");
    } else {
        console.error("AJAX Error:", error);
    }
}
});
The timeout is measured in milliseconds.
7.5 Using jQuery AJAX with Promise-Style Methods
The object returned by $.ajax() is a jqXHR object, which supports methods such as .done(), .fail(), and .always().
$.ajax({
url: “https://api.github.com/users/speedlink3“,
method: “GET”,
dataType: “json”
})
.done(function (data) {
console.log(“Success:”, data);
})
.fail(function (xhr, status, error) {
console.error(“Failed:”, status, error);
})
.always(function () {
console.log(“Request completed.”);
});
This approach can make AJAX code easier to organize when working with existing jQuery applications.
- Comparing the Four API Request Methods
Now that we have explored all four methods, let’s compare them.
FeatureXMLHttpRequestFetchAxiosjQuery AJAXTypeBrowser APIBrowser APIExternal libraryjQuery libraryPromise supportNot natively in its original APIYesYesjqXHR Promise-style methodsasync/awaitRequires wrappingYesYesYes, with compatible Promise interfaceAutomatic JSON handlingManual configuration/parsingManual response.json()Usually automaticConfigurable dataTypeHTTP error handlingCheck statusCheck response.okRejects by default for unsuccessful statusSuccess/error callbacksRequest timeoutYesAbortSignalYesYesRequest cancellationabort()AbortControllerAbortControllerjqXHR abort()Upload progressYesNot a simple built-in upload callbackSupported through applicable adaptersXHR-based upload eventsExternal dependencyNoNoYesYes
Which Method Should You Choose?
Fetch API: A good default for modern browser applications. It is built into the browser and works naturally with async/await.
Axios: Useful when you need a shared HTTP client, interceptors, convenient configuration, and additional request features.
XMLHttpRequest: Useful for legacy compatibility and applications that need its event-based functionality, especially upload progress.
jQuery AJAX: Useful when maintaining existing jQuery applications or integrating with older codebases.
There is no universal winner. Choose based on your project architecture, browser support requirements, dependencies, and actual needs.
- Understanding HTTP Status Codes
An API response does not always indicate success.
HTTP status codes help you understand what happened during a request.
StatusMeaning200OK – Request successful201Created – A resource was created202Accepted – Request accepted for processing204No Content – Successful response without a body301Moved Permanently302Found – Temporary redirect400Bad Request401Unauthorized – Authentication required or invalid403Forbidden – Access denied404Not Found405Method Not Allowed409Conflict422Unprocessable Content429Too Many Requests500Internal Server Error502Bad Gateway503Service Unavailable504Gateway Timeout
For example, if your API returns HTTP 401, the user may need to authenticate.
If it returns HTTP 404, the requested resource may not exist or the endpoint may be incorrect.
If it returns HTTP 429, the application may have exceeded the server’s rate limit.
Understanding these codes makes API troubleshooting much easier.
- What Is CORS and Why Does It Matter?
CORS stands for Cross-Origin Resource Sharing.
It is a browser security mechanism that controls whether JavaScript running on one origin can access resources from another origin.
An origin is defined by its scheme, host, and port.
For example:
These are different origins because their hostnames differ.
Suppose your website is running at:
And your JavaScript requests data from:
The browser checks the CORS policy for that cross-origin request.
If the API server does not provide the appropriate CORS response headers, the browser may block JavaScript from accessing the response.
A server may return a header such as:
Access-Control-Allow-Origin: https://speedlink3.net
This tells the browser that the specified origin is allowed to access the response.
For requests involving certain methods or custom headers, the browser may first send an OPTIONS preflight request.
Important: CORS is not a JavaScript setting that can simply be disabled to bypass server restrictions. The API server must be configured to permit the required origin and request characteristics.
Using mode: “no-cors” in Fetch is generally not a solution for reading a protected API response. It produces an opaque response whose body and headers are unavailable to normal JavaScript.
- API Security Best Practices
Making an API call is easy. Making it safely is more important.
Follow these practices when developing real applications.
11.1 Never Expose Private API Keys
Do not place private API keys, database passwords, or server secrets directly in frontend JavaScript.
Anything delivered to a browser can potentially be inspected by users.
Keep confidential credentials on the server and let your backend communicate with protected third-party APIs.
11.2 Use HTTPS
Always use HTTPS for production API communication.
HTTPS protects data while it travels between the client and server.
11.3 Validate Server-Side Input
Frontend validation improves user experience, but it is not a replacement for backend validation.
The server must independently validate incoming data before processing it.
11.4 Use Proper Authentication and Authorization
Authentication determines who the user is.
Authorization determines what that user is permitted to access.
Do not assume that hiding a button in JavaScript protects the corresponding API endpoint.
11.5 Handle Errors Without Exposing Sensitive Information
Avoid displaying internal stack traces, database credentials, server paths, or confidential implementation details to ordinary users.
Log appropriate diagnostic information securely on the server.
11.6 Protect Against CSRF Where Applicable
Applications using cookie-based authentication should implement suitable Cross-Site Request Forgery protection.
Use appropriate cookie settings and server-side CSRF defenses.
11.7 Apply Rate Limiting
Rate limiting helps protect APIs from excessive requests and abuse.
A server should enforce suitable limits based on the application and endpoint.
- Making API Calls in Node.js
JavaScript API requests are not limited to browsers.
Modern Node.js versions provide a global fetch() function, allowing you to make HTTP requests without installing an additional HTTP client library for basic use cases.
Example:
async function getGitHubUser() {
try {
const response = await fetch(
“https://api.github.com/users/speedlink3“
);
    if (!response.ok) {
        throw new Error(`HTTP Error: ${response.status}`);
    }

    const data = await response.json();

    console.log(data);

} catch (error) {
    console.error("Request failed:", error);
}
}
getGitHubUser();
You can run this code in a supported Node.js environment.
Check your installed Node.js version:
node –version
For a modern Node.js project, the built-in Fetch API is often sufficient for ordinary HTTP requests.
You can still use Axios when your application benefits from its additional features or when an existing codebase already depends on it.
- Common API Errors and Troubleshooting
Even correctly written JavaScript can fail when communicating with an API.
Here are some common problems and ways to investigate them.
ProblemPossible CauseWhat to CheckFailed to fetchNetwork or browser security issueNetwork tab and Console400 Bad RequestInvalid request dataRequest body and validation401 UnauthorizedMissing or invalid credentialsAuthentication token403 ForbiddenInsufficient permissionUser roles and server policy404 Not FoundIncorrect endpointAPI URL and route405 Method Not AllowedUnsupported HTTP methodAPI documentation429 Too Many RequestsRate limit exceededRequest frequency500 Internal Server ErrorBackend failureServer logsCORS errorServer does not permit the originCORS response headersUnexpected JSON errorInvalid or non-JSON responseResponse body and Content-TypeTimeoutSlow network or serverRequest duration and timeout
Use Browser Developer Tools
When an API call fails, open your browser’s Developer Tools.
In Chrome or Edge:
Press F12.
Open the Network tab.
Trigger the API request again.
Select the relevant request.
Inspect the Request URL.
Check the Request Method.
Review the Status Code.
Inspect Request Headers and Response.
Open the Console tab for additional errors.
This is one of the most useful debugging techniques for frontend developers.
Do not immediately assume that the problem is in JavaScript. The issue may be in the API endpoint, server configuration, authentication, network connection, or CORS policy.
- A Practical Modern API Call Example
Let’s combine the concepts into one practical example.
Suppose you want to retrieve a GitHub profile and display the username, name, and public repository count on a webpage.
HTML Load GitHub Profile
<div id="result"></div>
JavaScript
const button = document.querySelector(“#loadProfile”);
const result = document.querySelector(“#result”);
button.addEventListener(“click”, async () => {
result.textContent = "Loading profile...";

try {

    const response = await fetch(
        "https://api.github.com/users/speedlink3",
        {
            headers: {
                "Accept": "application/vnd.github+json"
            },

            signal: AbortSignal.timeout(10000)
        }
    );

    if (!response.ok) {
        throw new Error(
            `Request failed with status ${response.status}`
        );
    }

    const user = await response.json();

    result.textContent =
        `Username: ${user.login}
         Name: ${user.name ?? "Not provided"}
         Public Repositories: ${user.public_repos}`;

} catch (error) {

    if (error.name === "TimeoutError") {
        result.textContent = "The request timed out.";
    } else {
        result.textContent = "Unable to load the profile.";
        console.error(error);
    }

}
});
What Happens Here?
The user clicks the button.
JavaScript sends a GET request to GitHub.
The browser waits for the response asynchronously.
JavaScript checks the HTTP status.
The response is parsed as JSON.
The required properties are extracted.
The webpage displays the result.
If something fails, the application displays a suitable message.
This is a practical example of how modern JavaScript communicates with a real external API.
Conclusion
API communication is an essential part of modern JavaScript development. Whether you are building a simple website, a WordPress plugin, a React application, an ISP management system, or a complete business platform, you will frequently need to exchange information between frontend and backend services.
In this tutorial, we explored four important approaches:
XMLHttpRequest for event-based HTTP communication and legacy applications.
Fetch API for modern browser-based HTTP requests.
Axios for a feature-rich external HTTP client.
jQuery AJAX for existing jQuery-based applications.
We also explored async/await, HTTP methods, JSON parsing, request headers, timeouts, cancellation, CORS, security, HTTP status codes, and Node.js Fetch.
For most new browser projects, start with the native Fetch API. Choose Axios when its additional features are useful. Keep XMLHttpRequest and jQuery AJAX in your toolkit for projects that need them.
The most important lesson is that an API request is not complete merely because JavaScript successfully sends it. A reliable application must also check the response, handle errors, protect credentials, validate data, and provide a useful experience to the user.
Learn the fundamentals, practice with real APIs, and build reliable applications one request at a time.
Official References and Further Learning
The following resources are official documentation or primary project documentation. They provide the technical details used throughout this tutorial.
MDN – Fetch API
MDN – Using the Fetch API
MDN – XMLHttpRequest
MDN – XMLHttpRequest readyState
MDN – AbortController
MDN – AbortSignal.timeout()
Axios – Official Getting Started Guide
Axios – Error Handling
Axios – Cancellation
jQuery – $.ajax() API Documentation
Node.js – Global fetch Documentation
MDN – CORS Guide
MDN – HTTP Response Status Codes
MDN – URLSearchParams
GitHub REST API – Users
Documentation note: Browser support and library behavior can change. Always check the relevant official documentation and compatibility information before deploying a feature to production.